
A first taxonomy in Graphologi
This post will show you how to create your first taxonomy in Graphologi. To try this out yourself you will first need to sign up for an account at https://graphologi.graphifi.com
Once you have registered, log in. You will see the dashboard as below.
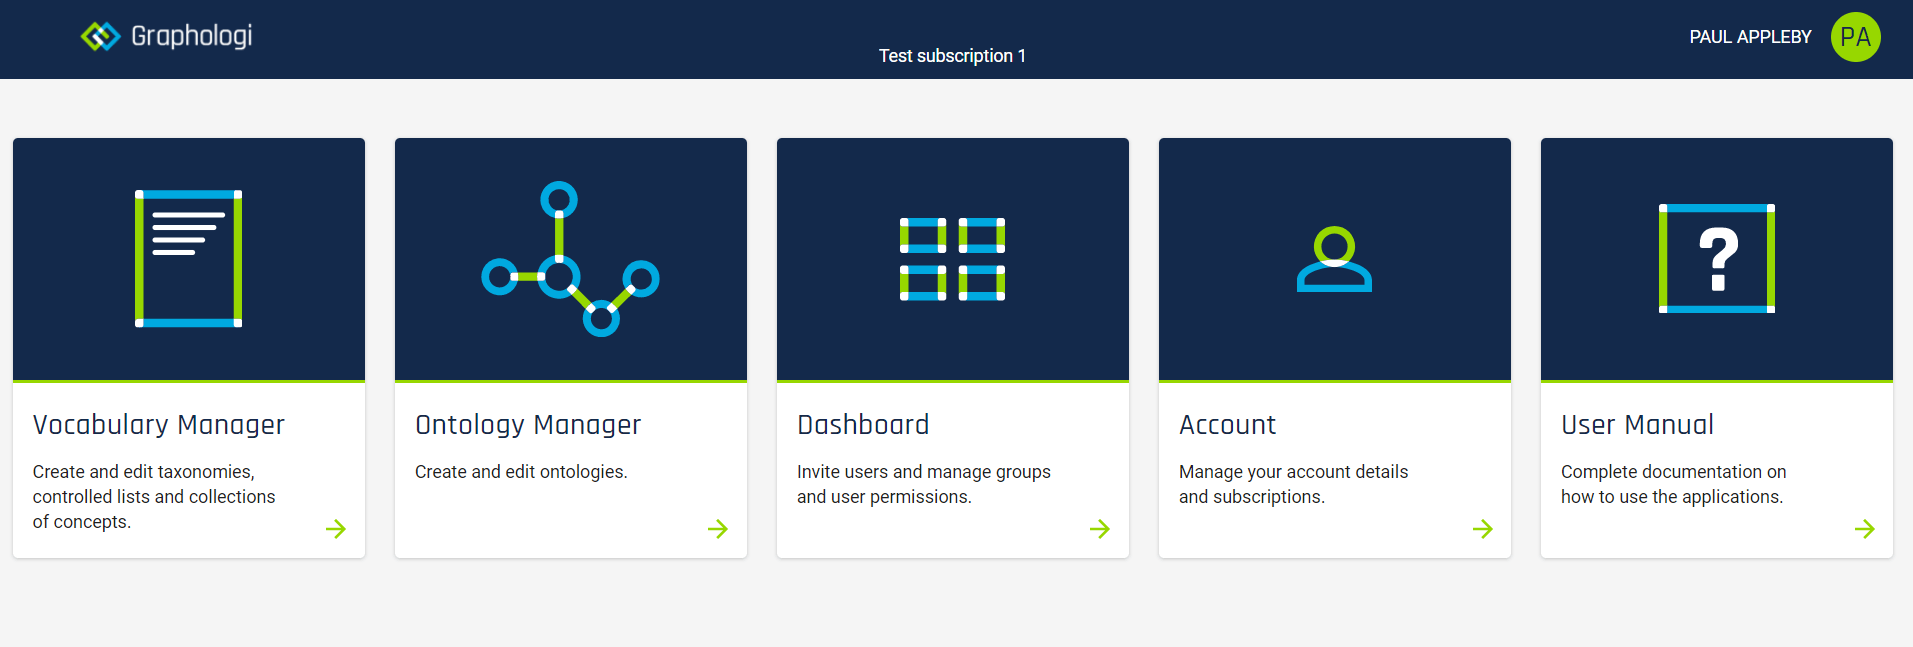
Click on 'Vocabulary Manager'. This will take you through to the projects dashboard. Everything in both Vocabulary Manager and Ontology Manager is based around a project so we first need to create one. Click 'Create Project'. You will see a dialog box as below.
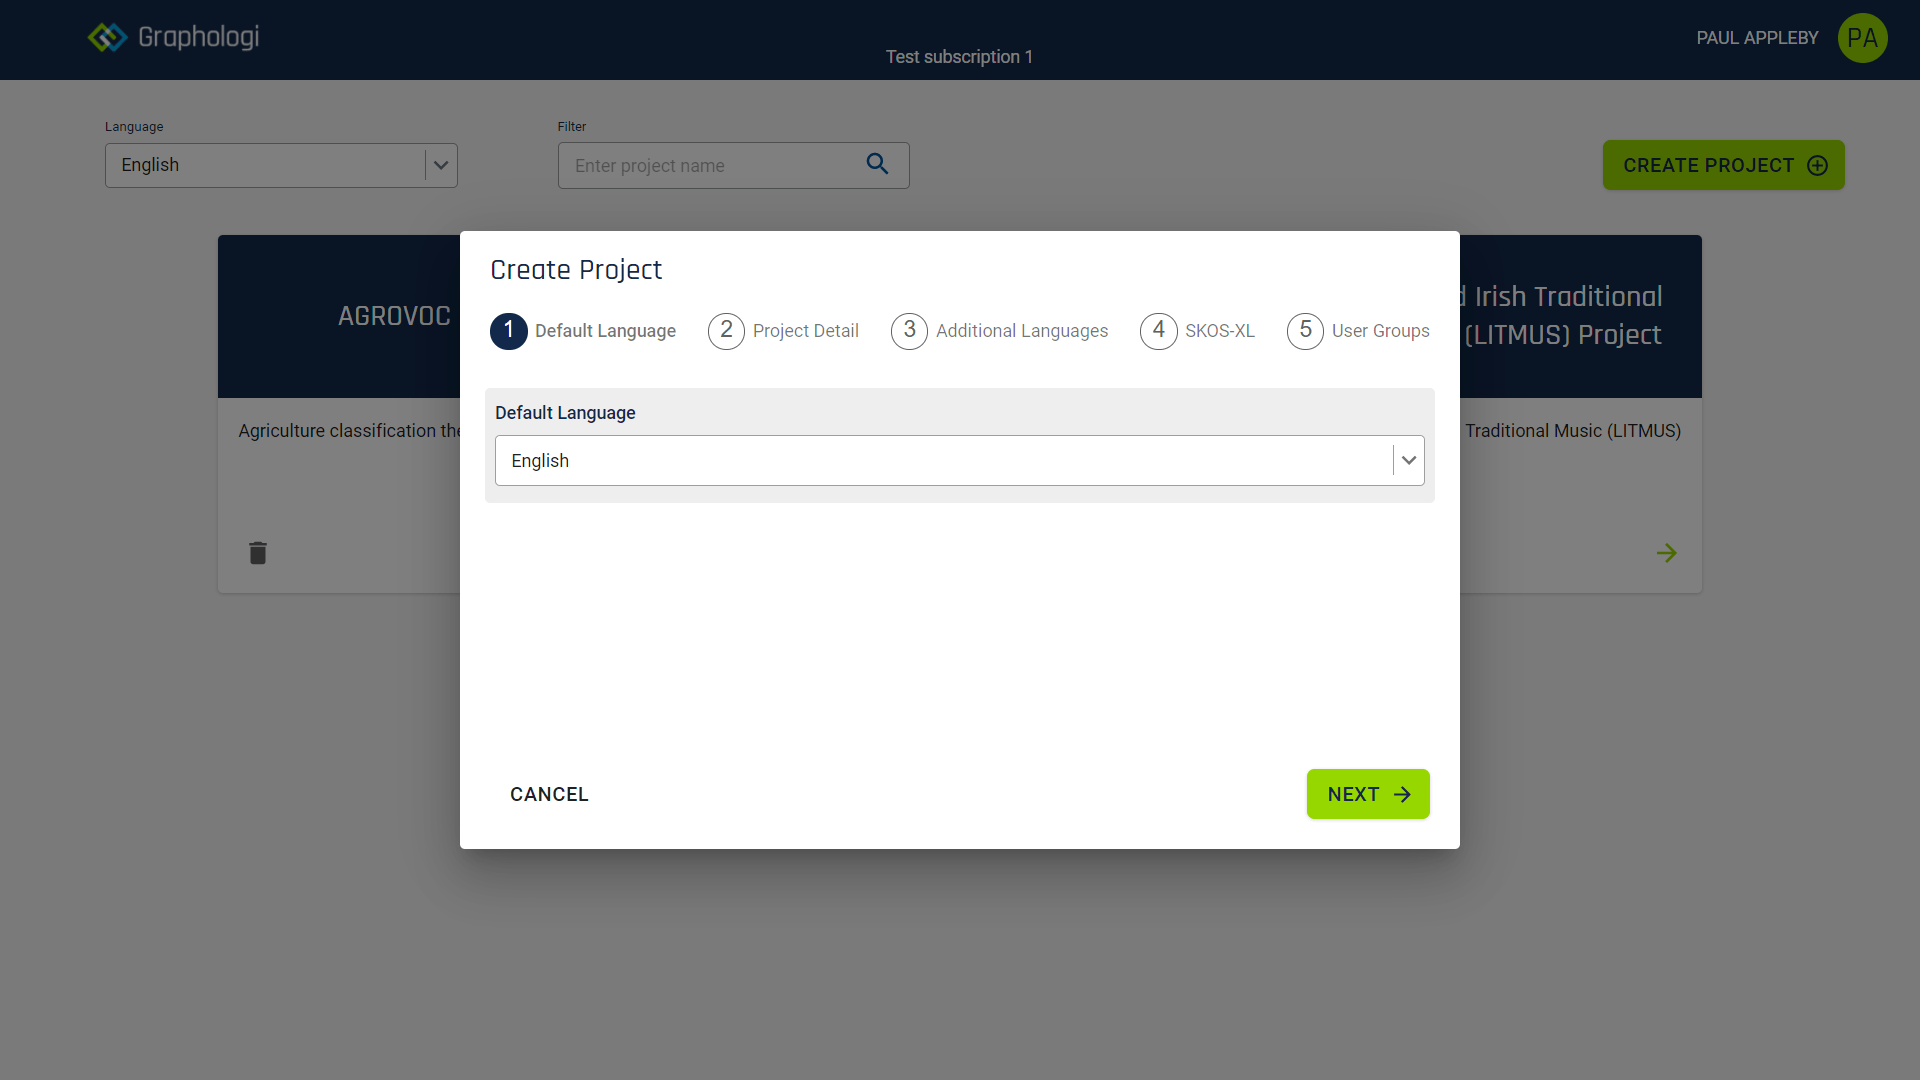
For now we will go with all the defaults. The first step allows us to select the default project language. This is an important decision as all concepts created in Graphologi must have a preferred label in the default language. Click 'Next'.
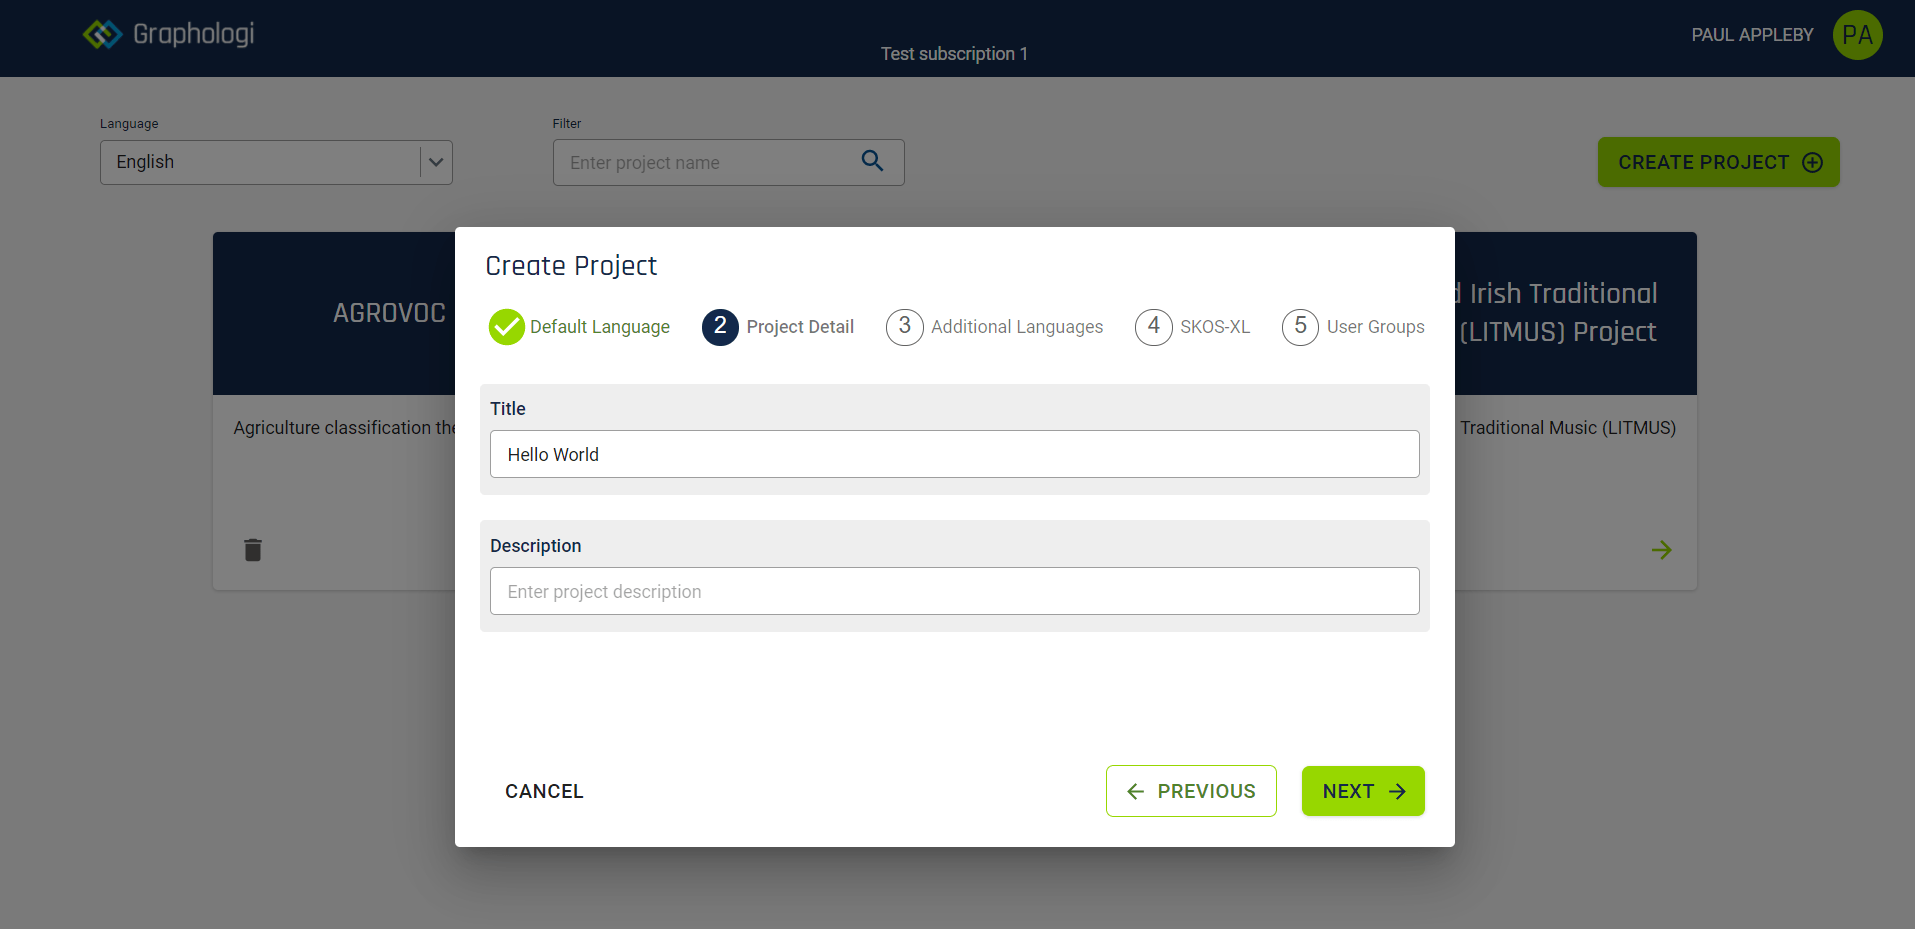
The second step is giving the project a title. You should see a screen as below. We will go with 'Hello World' for now. The description is optional. Click 'Next'. For the 'Additional Languages' and 'SKOS-XL' steps also click 'Next'. Then click 'Finish' on the 'User Groups' step.
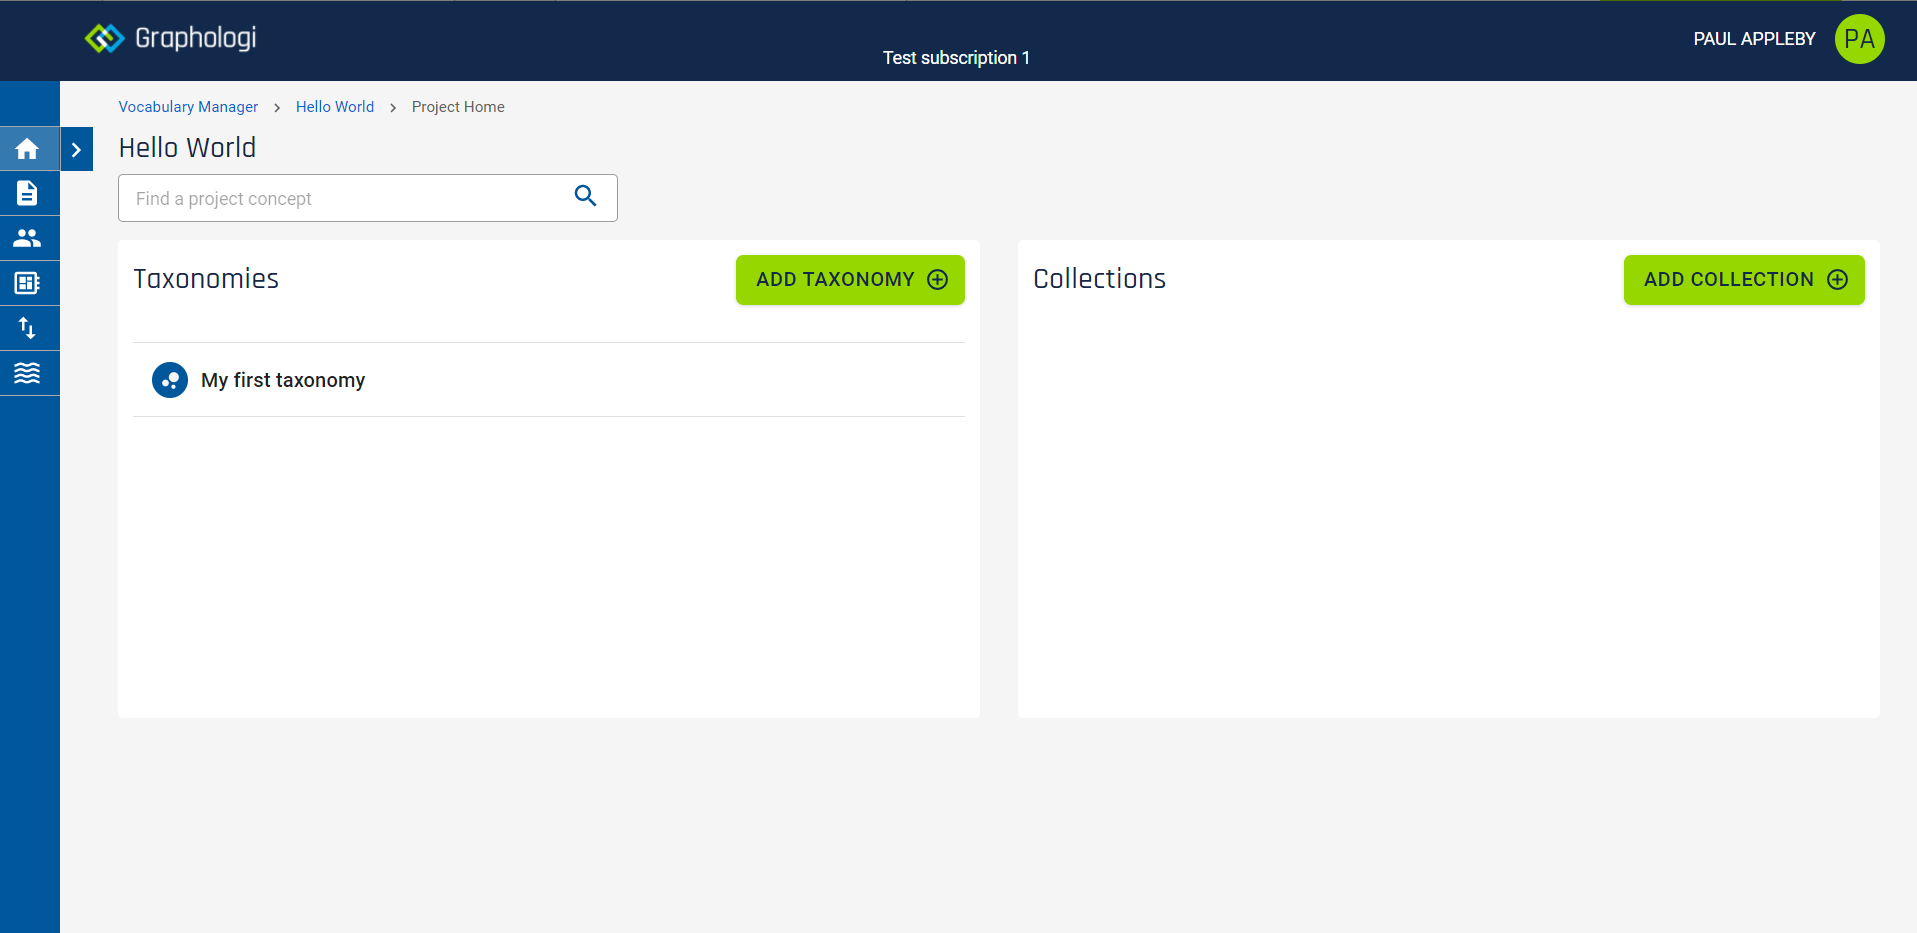
After a brief period you should then see the project screen, which should appear similar to the following image.
We are now ready to add our first taxonomy. Click the 'Add Taxonomy' button. This will display a dialog box as below.
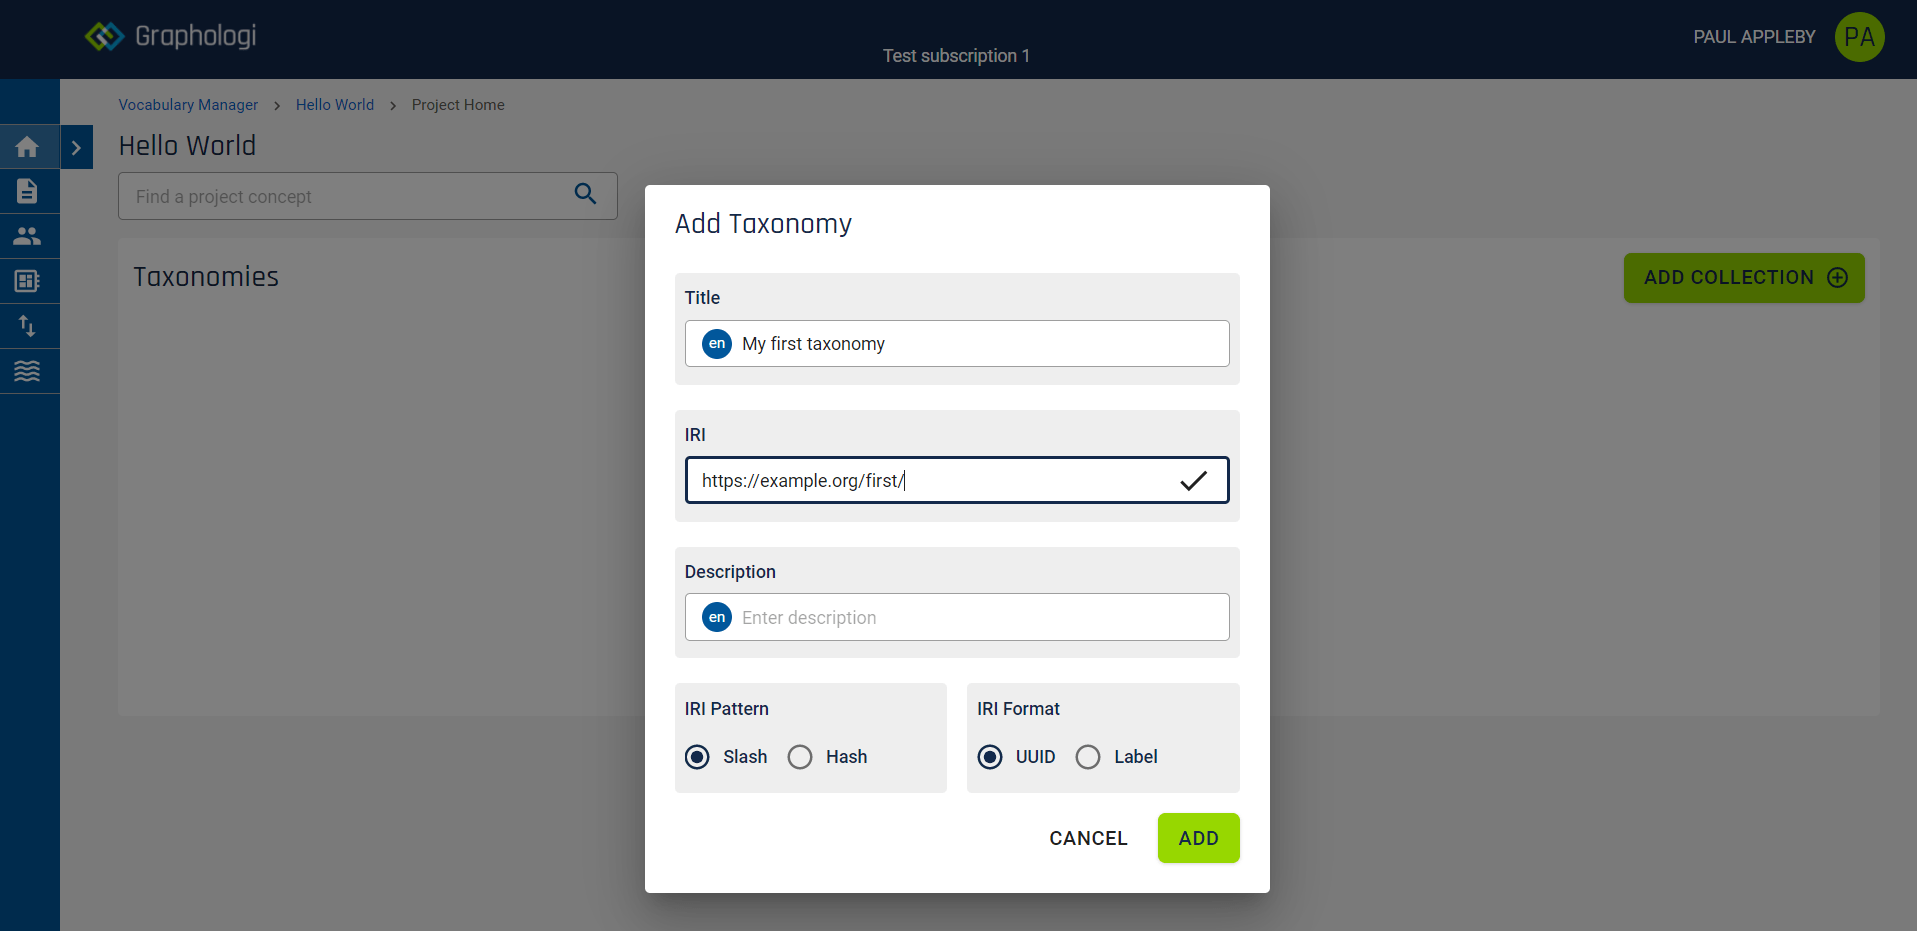
Give your taxonomy a title. Note that the language of this is the default project language 'en'.
You also need to give the taxonomy an IRI. This will form the base of all the IRIs generated by Graphologi for concepts within the taxonomy. In our example we just use https://example.org/first
Leave the description empty for now and also leave the 'IRI Pattern' and 'IRI Format' options as they are. The IRI Pattern controls whether slash or hash IRIs are generated by Graphologi and IRI Format controls whether a UUID string is used as the second part of the IRI for a concept or whether it is generated from the preferred label. Click 'Add'. The taxonomy will be listed on the project page.
To start editing the taxonomy click on its title. You will see a screen as below.
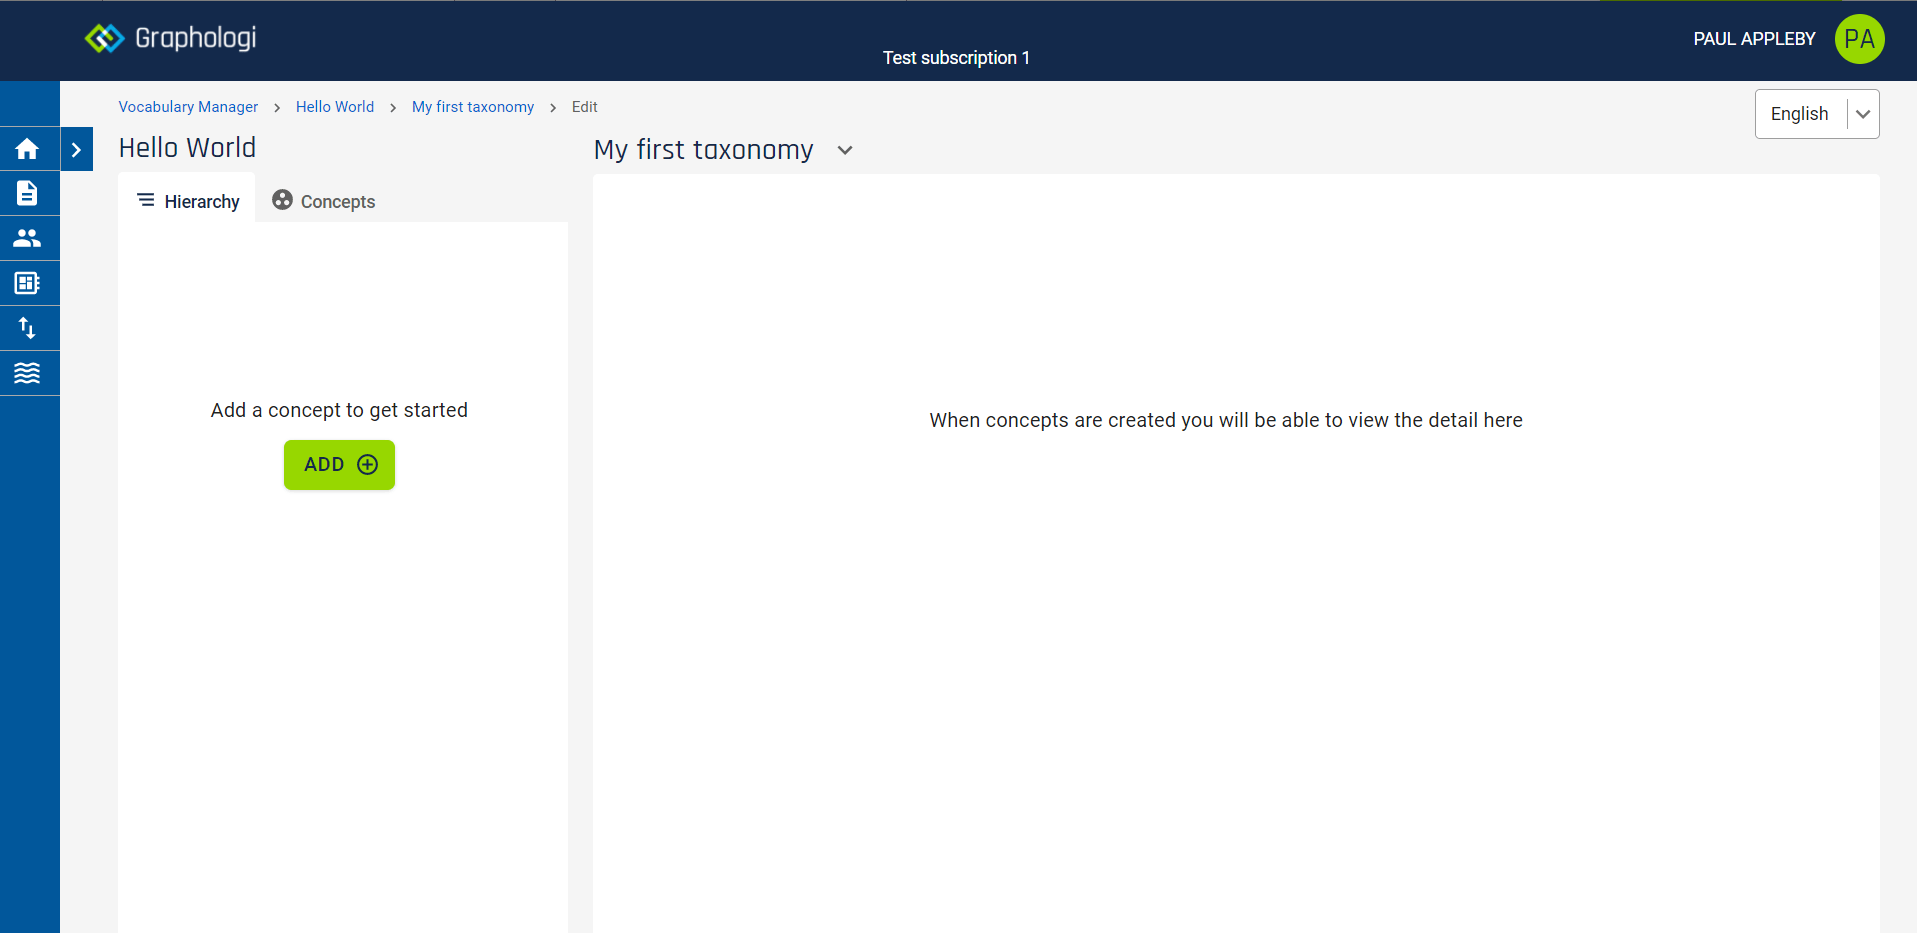
We will now add our first concept. Click 'Add'. You will see a dialog box as below. Enter a label for your concept.

Click 'Add'. Your concept will be added to the Hierarchy and the details of the concept will be displayed as below.
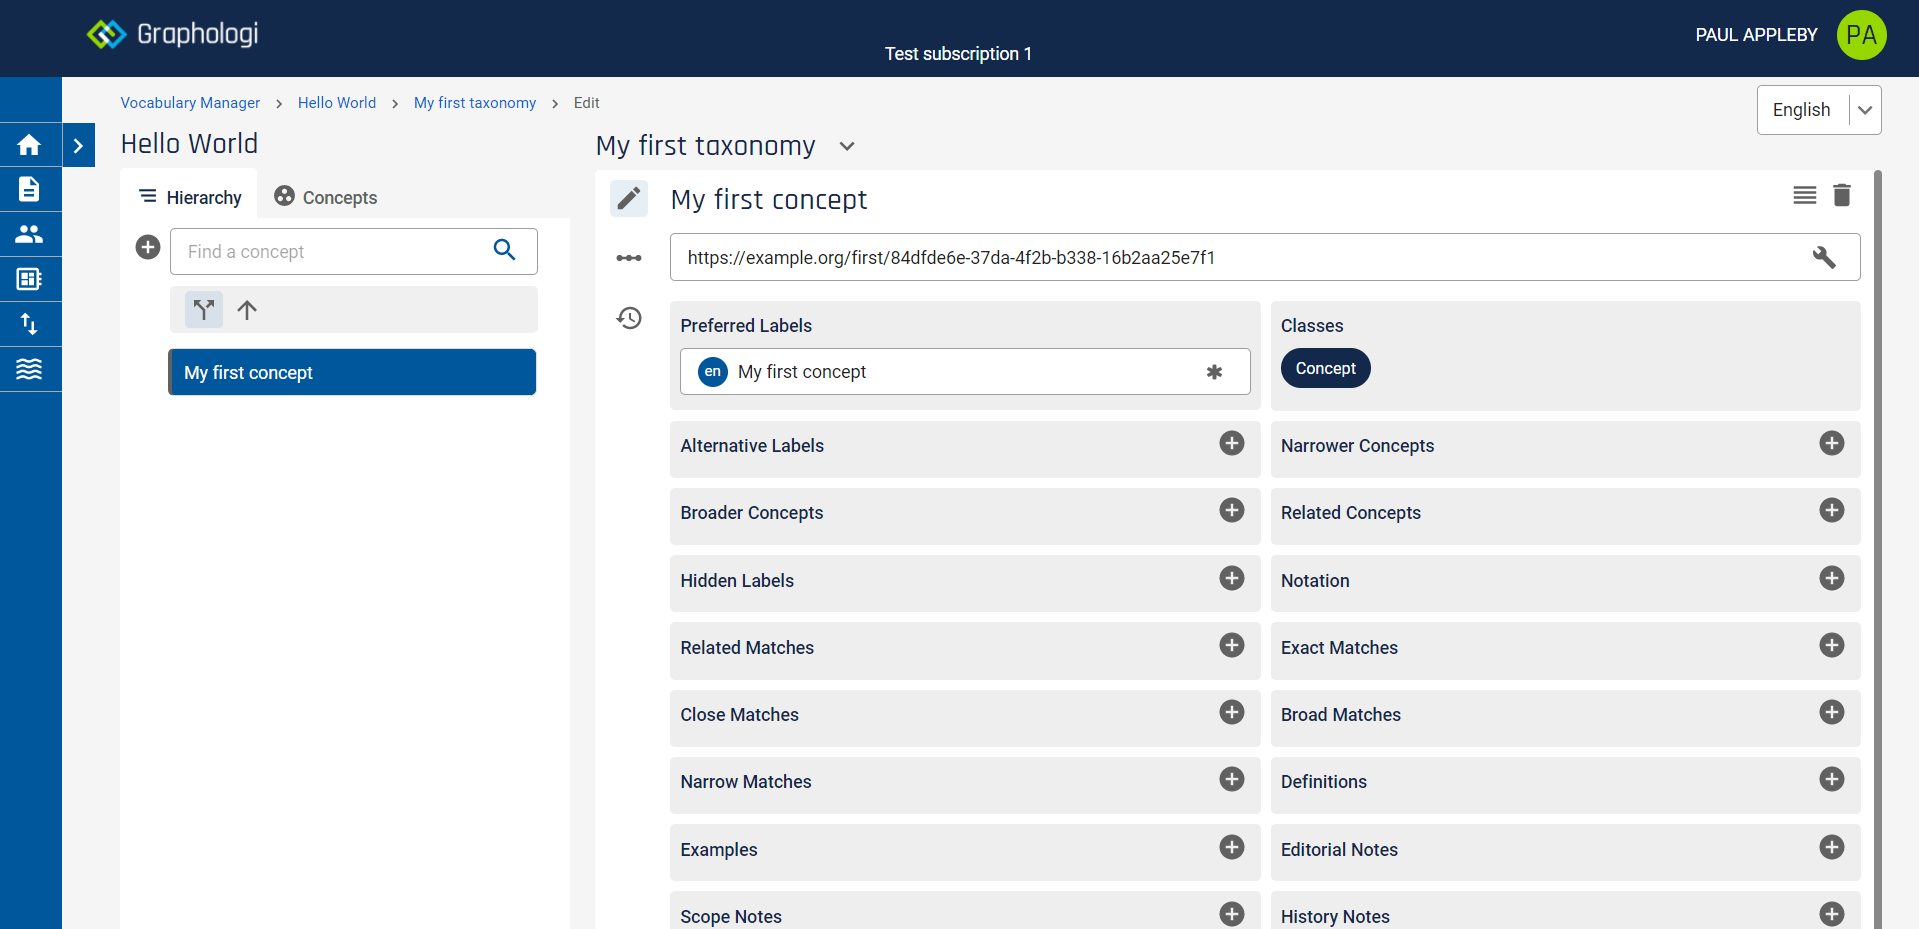
That's it. You are off and running. You can add more concepts by clicking the + icon to the left of the 'Find a concept' search box.
The full user manual is available at: https://graphologi.graphifi.com/docs/
but the section that will be most relevant for next steps will be that on Managing concepts. We will be publishing subsequent posts covering more features of Graphologi.
If you would like to know more about Graphologi or would like to see a full demo of it please get in touch.